Wednesday 12 November 2014

HubPages: Why I Chose the Garrett AT Pro Metal Detector

So many metal detectors to choose from... Why the AT Pro??

Not long ago, I got into metal detecting when I received a Bounty Hunter QuickSilver as a gift. It was a low end metal detector, but I quickly became fascinated with this hobby. I quickly knew that I wanted to get a new metal detector that would do a better job of detecting and identifying objects in the ground. I chose to purchase the Garrett AT Pro metal detector after doing much research, and I can't tell you enough how much I love this machine.

The Bounty Hunter model was a pretty basic model. Don't get me wrong, it worked just fine but did not reveal much information about the target that it detected. I spent way too much time digging up objects that ended up just being trash. This detector really helped me to realize that this was a hobby I am very interested in, and would continue to pursue. Like with all my hobbies, I found myself wanting to use quality gear. Quality gear that offers more capabilities leads to a more enjoyable experience and better results. If I was going to spend the time outdoors searching for 'my treasures', then I wanted to have the best gear that I could justify purchasing, and get the best results for my time.

I have found lots of coins, several pieces of jewelry, and many other cool things with my AT Pro. You can see some of them in the photo gallery below. I even had the opportunity to reunite a girl with her lost wedding ring after answering an ad that they posted looking for someone with a metal detector. The smile on her face when she was reunited with her lost ring was almost as gratifying as the thrill that came with finding it.

So why did I choose the Garrett AT Pro, when there are so many more metal detectors on the market that cost less? Let's take a closer look at the Garrett AT Pro's features and benefits, and see why I ended up choosing this model.


My Metal Detector Research - Learn before you invest.

I started off like everyone else, looking at the Amazon reviews, reading about metal detectors on the manufacturers' websites, and reading about what other people had to say in metal detecting forums. I had originally set a budget of $400.00 for my new purchase, and was looking at models within that price range. I was serious about getting into this hobby, and willing to spend a bit of money to get the right gear. At the time, this price range did not include the Garrett AT Pro, which costs right at $600.00.

I found several models that I liked, which included the Fisher F2 and the Garrett Ace 350, but was leaning toward the Ace 350. I liked the look and feel of this machine, and the feature set that it offered. It had great reviews and there were lots of people in the metal detecting forums that had great things to say about it. Though I noticed that most of the people in the forums that had good things to say about it were using the Garrett AT Pro. You see, in the online metal detecting forums, it is a common practice for the forum members to put the type of metal detector (along with some bragging about their metal detecting finds) in their forum signature. I kept seeing the Garrett AT Pro model popping up everywhere.

What really helped me make up my mind is when I consulted with another metal detectorist that lives in my home state of Kentucky. I had been watching a lot of his YouTube videos of his metal detecting hunts, and could see that he definitely knew his stuff. This guy used the top of the line MineLab equipment that was definitely out of my price range.

I approached him for guidance about metal detector selection and what my price range was. He spent a lot of time communicating with me about my options and offering advice. He told me that the selection of a metal detector is often where the biggest mistake is made for people who were serious about getting into the hobby. He told me that I really needed to stretch my budget by a couple of hundred dollars, and make the Garrett AT Pro the low end model of my metal detector options. He stated that it had features and performance that rivaled many of the more expensive detectors on the market today. The main reason he recommended this model though is due to the amount of iron in the soil here in Kentucky, and the Garrett AT Pro's advanced iron circuitry does a great job with discrimination. He told me how less expensive metal detectors can work just fine, but they come with 3 to 5 times the frustration level. He also stated that "This detector 'holds its own' with $1500-1800 metal detectors all day."

So after receiving this advice from someone that I trusted, I did my due diligence and performed more research on the AT Pro. I went to Garrett's website, and watched all of their instructional videos, read all of their literature, and reviewed all of the specifications of this model. I'll give you a closer look at the specifications and features that attracted me below, but by the time I had completed this research, I had made my decision.


Garrett AT Pro Specs

What attracted me and why.

I set out to find a metal detector that would perform well, have great quality components, and suit my needs for many years to come. Here are some of the key features about the Garrett AT Pro that really attracted me to this model.

Pro Mode Audio - In pro mode, you get to hear variable tone for what type of target is detected beneath the ground. The strength of the tone varies depending upon the depth as well. I love this because you don't always have to be looking at the LCD screen. You can let your ears do the work.
High-Resolution Iron Discrimination - You can set the amount of iron discrimination to one of 40 levels. This gives you the ability to tune out junk signals depending upon your needs.
Digital Target ID - When a signal is detected, a two digit numeric target ID is displayed on the LCD screen. This gives you the ability to distinguish one target from another based on its conductivity.
Fast Recovery Speed - When there are multiple targets in the ground, the AT Pro recovers quickly allowing it to detect multiple targets that are close to each other. This is great for trashy areas.
Waterproof to 10 Feet - This detector can be submerged to a depth of 10 feet. You need waterproof headphones for this. Lots of great stuff can be found in lakes and streams, and these are places that other metal detectorists typically can't take their metal detectors.
Operates at 15 kHz - Operating at this frequency allows this detector to identify small targets, gold, and jewelry that other metal detectors have trouble identifying.
Ground Balancing - You have the ability to automatically or manually ground balance this metal detector. This allows for compensation of mineralized soils or sand to allow items to be detected more easily.
Pinpointing Capability - The AT Pro has a pinpoint button that allows you to detect the exact location of where the object is buried. When you know exactly where to dig, you spend less time digging and can dig smaller holes.
Coin Depth Indicator - The Garrett AT Pro does a great job of estimating the depth of a coin sized object that is detected. Armed with this information, you know how deep you need to be digging to locate your object.
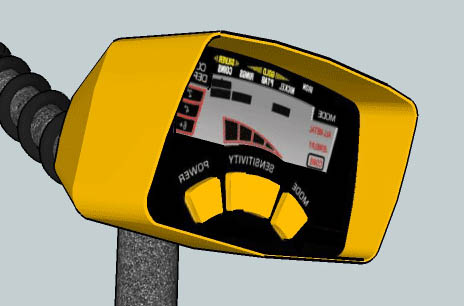
(Image Credit to InterRev - Personal Photo)


Learning About the Garrett AT Pro Metal Detector

After receiving and setting up my new metal detector, I first went to Garrett's company website and watched the 4 training videos they provide to help you learn about the AT Pro. I then watched 3 additional videos that they have about the different accessory coils they offer. I then discovered that they have an additional 31 videos showing people hunting for coins and other relics with the AT Pro. I watched all of these over the course of a week, and it was very helpful to see each person's technique and exciting to see their finds. I also discovered a tips and techniques video that taught the art of pinpointing, and an additional video that taught you how to determine the size of a detected object while still in the ground. All of these free training videos helped me become very familiar with my Garrett AT Pro, and prepared me to get outdoors with it.

The Garrett company recommends that you start off using the AT Pro in standard mode for at least the first 10 hours of operation, and that you dig every target that you detect. While this will have you spending a bunch of time digging junk targets, it is beneficial because it allows you to learn the type of signals that are associated with each object you find in the ground.

To be honest with you, I didn't make it but maybe an hour on standard mode before I switched over to pro mode. Since I have already used metal detectors in the past, I felt that this shortened my learning curve. I wanted to get right into pro mode as soon as possible so that I could start using the advanced features of this machine. I felt that all of the video training helped to jump start me anyway, and I was ready to "go pro".

I quickly learned to scan a detected object from multiple angles to see if the signal remained consistent. Utilizing the pinpointing feature of this detector from multiple angles also assisted in determining the precise location of the object in the ground. Learning to pinpoint an object accurately allowed me to dig smaller, precise holes. It also shortened the amount of time required to locate and recover the detected object.

I have become very proficient with my AT Pro in a short period of time, but every outing is a learning opportunity that teaches you something new though.

My Thoughts About the AT Pro

The Perspective From an AT Pro Owner and User

The short answer is that "I Love It".

While I don't want to bash the Bounty Hunter model that I started with, this AT Pro just offers so much more capability. The signals that it provides almost paints a picture as to what lies beneath the surface.

I am most impressed with the pinpointing capability, that allows it to identify the exact spot to dig. With my old detector, I often missed the mark and had to continue digging my hole wider and wider until I located the object.

I do a lot of hunting for coins (referred to as coin shooting), and the Garrett AT Pro consistently identifies the denomination of the coin before I ever start to unearth it. As with any metal detector, it doesn't get this right 100% of the time, but more often than not it is on the money!

I guess the biggest benefit that I get from using the AT Pro, is that it instills confidence in me. I know this is a quality metal detector with quality electronics. Based on what it tells me and the education that I have received on using it, I am very confident that the targets I choose to dig won't be trash. Time spent digging good targets instead of trash targets makes for a much more enjoyable (and profitable) experience. And that my friend, was worth spending the extra money that I had not originally budgeted for.

I guess the biggest benefit that I get from using the AT Pro, is that it instills confidence in me. I know this is a quality metal detector with quality electronics. Based on what it tells me and the education that I have received on using it, I am very confident that the targets I choose to dig won't be trash. Time spent digging good targets instead of trash targets makes for a much more enjoyable (and profitable) experience. And that my friend, was worth spending the extra money that I had not originally budgeted for.


Taken from: Here

Wednesday 5 November 2014

Beach metal detecting secrets – Lugworms

I have been metal detecting on the beach for many years and in that time I have picked up some great tips and little secrets to increasing my finds on the beach.

All beaches can be different and you need to adapt these secrets to your given beach. With this in mind, here’s an interesting beach metal detecting secret I want to share with you. It will help you find more and it has certainly helped me over the years.


Look for the deep Lugworm
Yes, you read it correctly, ‘look for the deep lugworms’, which give their positions away with their sandy worm casts.

Believe it or not, the beach Lugworm can help you find those deeper and possibly more valuable finds, but How, I hear you ask?

It’s fairly simple but an effective way of finding areas to possibly concentrate on. The dark black sand that lies beneath the soft shifting sands of the upper layers of the beach can be very productive for finds of all sorts. This is because this hard packed dark sand traps finds that have worked their way through the finer upper sands and is usually out of the reach of beach metal detectors. The finds in these darken hard packed sands have also been there for some time, out of the reach of most metal detectors.

This layer of hard dark sand can lay undisturbed for years and only be brought into range of your detector by some of the violent winter storms. They can also be brought into range by the gentle erosion on some beaches which you would not notice if it wasn’t for the humble Lugworm.

Lugworm dig down into the sand and they can give away some clues to the dark dark sand beinglugworm near the surface in the form of worm casts on the beach.


We have all walked along the beach at some point and seen the Lugworm casts that resemble coiled worms made of sand.This is the Lugworm digging down into the sand and pushing the sand out in the form of these coiled casts. The worms don’t stop when they reach the darker sand and as a result the worm cast on the beach show the pushed out sand from these dark layers.

As a result, it gives away the position of the dark, hard packed sand near the surface. Not all beaches have lots of Lugworms or the correct conditions. If the beach does hold a Lugworm population, I would always advise you to keep your eyes open for the signs, and those darker Lugworm casts.

The dark hard packed sand is nearer the surface and could hold some great finds, it will certainly hold the older finds. This is one of my odder metal detecting secrets, but one that has helped on certain beaches.

Taken from: Here

Sunday 2 November 2014

Metal Detecting 101

The Tesoro coil zipped back and forth over the freshly plowed field.  The silence was suddenly broken by several distinct beeps.  Found something!  The army shovel easily dug into the soil.  My excitement grew.  As I sifted through the dark dirt, a metallic form appeared—the key to an old GM truck.  Ok, I admit, not a huge find, but it does not negate the fun and a good time outdoors.


January, February and March have offered up several mild days this year.  Those months are a fine time to get out and do some metal detecting.  Last year my next door neighbor bought a metal detector and three weekends ago we set out to hunt the aforementioned field.  We found several other items that day:  pieces of plows, rifle casings, shotgun casings, pull tabs, etc.  But his son stumbled upon a nice arrow head—a tremendous discovery.

I’ve enjoyed this pastime for about six years plus.  A very satisfying—and addictive—outdoor hobby.  So, I wanted to take a moment and share some things I've learned and let you know about this wonderful activity.  Here goes:

What You Need


Buy a decent metal detector.  No, you don’t have to buy high-end with all the fancy bells and whistles.  My Tesoro Silver uMax has all the basic features and performs great.  I purchased mine for around $300.  The main ability you want from a detector is a discrimination setting to filter out “junk” metal.  And good sensitivity settings.  Some use dials and sounds to do this and others employ electronics with digital readouts.  Shop around for a quality product.  Go check out Tesoro’s website to learn more about detecting and their products:  http://www.tesoro.com/
You need a small, but strong shovel.  I carry an army shovel found at your local Army Surplus Store.  Nice fitting gloves help you dig and sift without cutting your fingers.  I also carry a carpenter’s nail pouch around my waist.  This is where all my finds, along with junk metal are stored.  Don’t just throw junk metal back down.  Otherwise, you may be digging it back up in the future.  Plus the property owner does appreciate you cleaning up a bit.
Another handy accessory:  a set of headphones.  These plug into the metal detector and allow you to search without anyone hearing the sounds, but you.  I use this at the beach so I won’t disturb my fellow vacationers.
When to Go

I prefer the late fall to early spring timeframe.  Bugs are still gone and vegetation is still dormant.  While you're there, mix in some shed hunting and preseason scouting for turkeys.
A recent rain makes the soil easy to manage.  Also, if looking for arrowheads, the rain helps wash dirt away from the artifact.
Where to Hunt

Always, always follow the laws.  Most state parks and federal lands will NOT allow metal detecting.  There are stiff fines for not observing these rules.
I try to look for old home sites or abandon roads.  A few years ago, I found a stash of wheat pennies buried along an old logging road.  In the mix was a 1902 Indian head penny.  Other great sites:  old outhouses, campsites, farm sites, church grounds, plowed fields, places where social events were held, historic travel routes, etc.
The beach is another great place.  I usually find modern coins there.  Occasionally, one might find a ring which has slipped off a wet finger.
Most times, you will be searching on private property.  See the next section for metal detecting ethics.
Metal Detecting Etiquette

Leave the land like you found it.  Dig small undetectable plugs.  Stay away from emasculate lawns and expensive landscaping.  Some metal detecting hobbyists leave a bad taste in others mouths because they leave huge potholes behind.  Never leave trash.  Also, don’t fail to tell the owner about those tire-blowing nails you found and that you removed them.
Never trespass.  Get permission from the property owner.  Make sure you have an agreement about your finds.  After all, it is their property.  I’ve found that owners can be very curious about what might be buried on their land.  Be truthful and they will be inclined to invite you back.
For more, look at Tesoro’s Metal Detectorist Code of Ethics.
Take a look at some pictures of my Tesoro and my finds.  Happy treasure hunting!

Thursday 30 October 2014

Metal Detectors : How they work (Very Simple Guide)


Metal Detector is a device to locate hidden metal parts, pipes and electrical conductors on land and under water, usually has a electronic circuit and a coil. Previously we wrote about Radio-frequency Identification or RFID which uses the electromagnetic waves the allows automatic identification and localization of objects and living beings. RFID uses complex, targeted technology but per se Metal Detector has not much target or rather it can be used only where broader scanning is required to detect mere presence of Metal with some added exceptions by logical use of Physics.

Read More : Here

A General guide for those of you new to metal detecting

A. Tools needed
B. I have a Metal detector and gear now what do i do?
(places to hunt)
C. How do i use this thing?
(tips )
D. My metal detector is beeping at me now what?
(how to dig)
E. A personal note on ethics
F. List of terms
__________________________________________________ __
A reality check about metal detecting. Metal Detecting is a hobby, You will not get "Rich" unless you get very lucky and find something that is extremely valuable. BUT if you take the time to learn your metal detector and get out and hunt you can easily pay for it. Not to mention that it is also good fun and good for your heath. Like any other pursuit in life you get out of it what you put into it.
__________________________________________________ ___

A. I want to go treasure hunting !!!! What do i need?

First off you will need to get a metal detector, there are literally hundreds of them on the market today so you can pick and choose what will work for you based on your price range etc. Do some research or ask on the forums what would be best for you.

(Rule number one.. READ YOUR MANUAL!!)
(manuals can be found online if you have misplaced yours)

Ok so you have just bought your first detector or maybe you found your dads in the attic. What do we need now? Below is a short list of things you should have with you when you go out treasure hunting.

1. Something to dig your "plugs" with. There are plenty of items you can use from garden trawls to special built metal detecting tools.
2. a square piece of cloth to put the dirt on when digging. you always want to leave the area you are digging looking like it was untouched.
3. A bag to keep your finds /trash in. (always take out everything you find, Don't leave the trash)
4. Gloves
5.Long handled screwdriver or something you can poke into the ground.
(not recommended on suspected old coins)Silver etc.

(optional but recommended items)
1. A metal detecting pin pointer is highly recommended.
2. bug repellent/ sun screen / water /food / Spare warm clothes/first aid kit.

_______________________________________
(Rule..Always find out local laws , or get permission from landowners)

B. Ok i have my gear where am i going to find the treasure ?

Well treasure is in the eye of the beholder, it can be anything from a penny to a brass belt buckle or a old civil war bullet. The first place you should hunt is in your own front and back yard you never know what might have been hiding right under your own feet for all these years.

The best places are school playgrounds , parks, soccer fields , the beach etc.. Everywhere humans have been they will have dropped treasure.Do some Research on the history of your local area. Find out where the oldest area's are and hunt there if you want to find old coins and other treasures. Patience and knowing your area's history is what will get you the really good stuff. Remember.. Knowledge is power.
________________________________________

C. OK, I have found a promising area to start my treasure hunt now what?

First we need to understand how a metal detector works. When you turn your metal detector on the coil sends a signal down into the ground.
If there is a target under the coil the metal detector will make a sound, All metal detectors have a zone where they can pick up a target in the ground. Take a look at the picture below.

The detection zone varies based on type of metal detector and type of coil you have on it. But this is the basic idea.
Your detector only has a limited area it can send the signal. Think of it as a Inverted ice cream cone.

When your detectors 'Cone' Sees a target (1) it will give you a signal.


If the target is outside the 'Cone' (2) Even though the edge of the coil is over the target it will not see that target.
So it is very important for you to overlap in your search pattern. See the next picture to get a idea on a good search pattern.


A good rule of thumb is to overlap your last swing with the coil by 50%. Even more if you really want to get a good coverage.

(Tip) Make sure your coil is as close to the ground as you can keep it, Swing it in a easily repeatable motion making sure that at the end of your swing the coil isn't coming up. Keep the coil level with the ground at all times.

To make sure you cover as much ground try running a back and forth overlapping pattern. See picture below.


start at the A position and go down the field. when you have gone as far as you want turn around and got to position B.

There are different patterns for different situations. Sometimes its better to cover as much ground as possible (beaches, in the woods etc) You can run a wandering S or Z pattern on the beach to look for the "Coin line" that tends to happen on the wet part of the beach.

(Tip#1) Where you find one treasure your going to find more..Over time people loose things in the same places over and over again. Take note of these places so you can go back in the future and find more.

(Tip#2)Take your time.. Going fast and rushing about is only going to make you miss targets you would have found otherwise. (like small jewelry,rings etc) I can not stress this enough GO SLOW... This is one of the main reasons why people find coins etc in so called "Hunted out" areas.
__________________________________________________ ___
D. OMG!! OMG!! my metal detector is beeping at me !!!!

Wow what can it be? Lets dig it up and find out !! Hold on just a second there chief we need to discuss a couple things first.

( Tip)first thing take out your pin pointer and run it across where you think the target is.. A lot of times this will keep you from digging huge holes. (i hope you have a pin pointer)

Ok so your pin pointer didn't pick anything up? It is now time to dig. Hopefully you have (READ THE MANUAL) for your Metal detector and you understand how to pinpoint the location where the target is.

( TIP#3)toss a coin down on the ground and practice..Practice..practice!!)

Make as small a hole as you can, after a couple inches run your pin pointer (or coil if you don't have one) over the hole and dirt. Do this every couple inches until you find the target.

( Tip#4) If your target disappears and you simply can not find it in or out of the hole. This happens due to the Halo effect. Keep digging down 2-3 inches(or more) the target is still there. But sense you disturbed the targets halo your detector can't see it anymore. This is where a good pin pointer and experience comes in.

( Tip #5) Always dig pull tabs..A lot of gold rings etc come up in the pull tab/5c range on most detectors. Discriminating those out is going to keep you from finding those targets.

(Rule.. Always leave the target zone the way it was before you started digging. Do not leave big holes and dirt strewn all over the place .)
This is a sure fire way of having the local authorities pass laws etc against Metal detecting.
___________________________________________
E. Who needs a code of conduct ?

Each of us have the responsibility to ourselves and other treasure hunters to make sure we do NOTHING that will give law makers property owners the excuse to ban or outlaw our hobby.
Not doing so in the long run is only going to make it so you and others can't enjoy this great hobby. I hope you take this message to heart.

Go here Link
And read the code of conduct.
____________________________________________

List of Terms.
1. Plug = A reference to a chunk of sod/grass etc you cut through when making your hole.
2.Pin-pointer = a hand held device that lets you know when your close to your target.
3. Target = A piece of metal your detector is picking up on.
3. Coil = The end of your metal detector that you swing back and forth close to the ground.
4. Coin line= Due to wave action/tides/weight of object etc coins and other objects tend to be dropped in certain areas or are moved to the location buy natural forces.
_____________________________________________

Last but certainty not least .. Thank you everyone on the forums for supporting this great hobby and for answering all questions people ask.


(disclaimer.. The list above is only a general guide about metal detecting and all views are my opinion only)

Taken from http://metaldetectingforum.com/showthread.php?t=60491

Thursday 6 March 2014

Beach Search Patterns "How do you search yours?" Part 1#

Searching beaches can present a number of problems for the novice detectorist. The beach you're planning to search could be huge! Or maybe it’s covered in signs that you read about, scallops, tide marks, cuts and so on. Then again you may be on the clock. The great thing about learning about the beaches your search is that no matter what machine you use this information will stand to you for years to come.

The Quick Search.

If you are just scouting a new location or stopping by at a beach you always liked the look of. it can be more beneficial to target the more productive areas first. Areas such as the low tide mark, towel line, paths and handy seating locations. Remember even if you're only pulling up newer coins, pull tabs and other common junk targets. These finds can be very handy when you profile your new location.

Tip: always keep a small note pad and pen handy. Sketch your new beach and mark your finds and other characteristics roughly. You can review your notes later and build a new plan of action for next time.

If the location has common markers such as scallops, cuts, gravel bars and sand riffles hit these first and see what you come up with. Take note of the feel of the sand under your feet squashy soft sand normally means you're far from the hard pack and heavy gravel under the surface of the beach.

Items will sink down to the denser hard pack and rest there and your detector may not reach the entire way pass the sand overburden. This is why beach detectorist get weak in the knees after a storm has stripped the light sand from the beach exposing the hard pack and gravel.

If you’re new beach is smooth and relatively gravel free a new search pattern is required. A repeating "W" search pattern works out best.

This works well because you can cover larger portions of the beach looking for lines of targets. If you find a target halt the "W" pattern and search in a straight line for a bit. You may have found a streak of targets or a small pocket of targets. Some detectorist will search in a spiral pattern starting from the location of the first find.

Even if you are short on time during your session take five minutes to look over the beach from a vantage point. Just like your targets you should make a quick note of anything that stands out. When you head home fire up google maps and see if what you have experienced on the ground translates to patterns found on the map view.

Normal Search Patterns

On a normal day detecting on the beach I like to search left to right from the high tide mark following the tide as it heads out from the shore. Of course if you arrive on the beach and it has some nicely defined markers or it has been stripped I like to concentrate on those markers. I still follow the left to right pattern but only over these hot areas.

If you are digging targets look for changes in the sand, gravel or clay you are digging. I always find the good targets reside in the layer of dark, almost black layer of clay. This layer is below the gravel and crushed shell layer. Normally it stinks too! So you will know it forever more after that first time. This layer is so tightly packed that metals that the sea would normally devour can survive much longer.

Periodic Table By Electrical Conductivity

Here is a very useful graph showing how conductive or restive known elements are. When metal detecting the conductivity of you target plays a huge part in deciding what to dig.


Below is the same data in a list format. I've highlighted the good stuff.

Wednesday 5 March 2014

Garrett AT Pro International Tones and Their Meaning


Having had the time to put some hours on the Garrett AT Pro International over a few months I've come to the conclusion that all detectors should come with a library of short audio clips to help new users to train their ears at home. Yes I know there are plenty of instructional video clips on youtube. But most of these videos have an audio stream that is out of sync with the video itself. Also many detectorists shoot videos that are far to dependent on the visual identification display on the detector itself. Im pretty sure that I'm not alone in saying that my hearing ability is far faster at processing the feedback from the machine then keeping my eyes glued to the detectors display looking at numbers that are displayed in a delayed fashion. In other words you hear the audio signal first and shortly after the display is updated. Yes the display is updated within milli seconds but I find this is enough to get on my nerves!

Anyway back to the topic of this post. The short audio clips below are examples of the feedback you get from your Garrett AT Pro International. I have used these to help me understand the makeup of the ground i am covering without the need to keep looking at the VID display. Also even though Garrett have a standard mode they recommend to new users I'd say just skip this mode and head straight into Pro Audio and learn from there.

I have included the STD audio clips just for reference.

So I hope someone might find these useful enjoy.

Garrett AT Pro International Pro Audio Mode


Garrett AT Pro International High Tone Pro Audio Mode


Garrett AT Pro International Iron Audio Bottle Top Sample Pro Audio Mode


Garrett AT Pro International Iron Audio Coin Sample Pro Audio Mode.


Garrett AT Pro International low Tone Pro Audio Mode


Garrett AT Pro International Medium Tone Pro Audio Mode.mp3


Garrett AT Pro International Proportional Audio


Garrett AT Pro International Tone Roll Audio Demo Pro Mode Bottle Cap Tone Roll Example


Garrett AT Pro International Standard Audio Mode


Garrett AT Pro International Tone Roll Audio Demo STD Mode Bottle Cap


Garrett AT Pro International Tone Roll Audio Demo STD Mode US Nickel


Garrett AT Pro International Tones High Tone STD Mode


Garrett AT Pro International Tones Low Tone STD Mode


Garrett AT Pro International Tones Medium Tone STD Mode.


Tuesday 4 March 2014

Easy Homemade Gold Sucker


Other tube id 1 1/2″ type 125 PVC
Inner tube is 1 1/4″ Type 40 PVC
Length is about 3-4 feet.
The handle is made from 1/2″ PVC end caps and a 1/2″ tee with a couple of short pieces of 1/2″ PVC pipes to connect. The handle is bolted thru handle to the end cap.
Use 1/8″ file for O-ring grooves. Depth of O-ring grooves must be about 1/2 of the dia of the O-ring cross section. Note: I have excluded part numbers as this design is from 1994 and part numbers chance. Because of this you may need to have a poke around your local hardware providers to find an O-ring that gives the best seal.
With the crevice sucker attached, the plunger may be pumped several times until the material reaches the top of the 1/2″ pipe. Another possible attachment would be a 1 1/2″, 45 or 90 degree tool instead of the normal crevice sucker.
Since the gold sucker is normally used with the bottom open, you may be asking “how do you keep the stuff from falling out the bottom?” The short answer is ya gotta be quick. Try to keep your bucket or pan as close to the spot you are working ans almost submerged so you don't have to move the sucker very high or very far. It also helps if you can get into a rhythm where you are still pulling on the plunger while transferring the material. Clean up any material that falls out every now and then.
Credits for the design go to William F Westcott (1994)

VLF metal detectors and their operating properties

There are many good explanations on how a VLF metal detector operates available all over the web. They range from very hi-tech to not so much. When I decided that I needed to have a better understanding of all the voodoo involved I knew that I would be wading through some very heady material that I was going to have problems wrapping my head around. So here are the conclusions I have drawn based on my own research I hope I've been able to lay it out in a clear and concise manner that you can understand. If you have anything of value to add, corrections or ideas please comment and let me know.

Quick overview of a typical VLF (Very Low Frequency) Metal Detector


A basic metal detector consists of a control box and search head mounted on a shaft.

The Search Coil / Head


The guts of the search head consists of two coils made of copper. One coil is the “transmit” coil and the other is the “received” coil.These are normally written as TX Coil and RX Coil. These coils are electrically separate from each other (As in they don’t touch each other) and exit the search head via a normally waterproof connector that runs along a set of wires up into the control box.


The Control box


The erm “Brain” of the machine. To be honest this little box will be your friend but also your worst enemy, well at least at the start anyway. Internally the control box consists of the detectors circuitry, batteries, control knobs, buttons, speaker and maybe a visual display of some kind. Different brands or detector will have varying names for the functions of a their detector. But VLF metal detectors as a rule of thumb have the ability to produce a noise relative to your target via the control boxes internal speaker or via a set of headphones. Ability to discriminate targets based on their conductivity. With a lot of modern machines you also get a visual display the shows numbers indicating your target this differs depending on the brand of detector you're using and even how deep it is (More on this later because nothing in life is that simple). We now know the parts that make up the detector we can have a look at how the thing actually works. The control box generates an electromagnetic field in the transmit coil. As you swing your detector over a metallic object that object interacts with the magnetic field this change in the magnetic field in picked up by the RX coil. The change received by the RX coil is slightly different depending on the conductivity and size of the target. These changes are processed by the control boxes circuits. On moderns machines much of the analyse is carried out by a processor. The processor contains software that is developed by manufactures for their machines this software is a closely guarded secret. But in general the signals generated and received are analysed by complex algorithms that are designed to give better separation between targets and also better identification of those targets.
As time marches on and technology improves metal detectors get better and better at what they do. Whatever technology proves best maybe just improved versions of what we use now or maybe there is a new technology just around the corner?

Gold what is it, Where is it and How to Spot it.

Gold mixed with black sand in a pan

Yes that's it, it doesn't look like much but it's been making people weak in the knees for thousands of years. The value of gold continues to grow because of its use in the electronics industry as a semi conductor.
The Properties of Gold
Gold is a very heavy yellow metal. It has a specific gravity of 19.3 this means that if you were to fill a test tube with gold it would weigh 19.3 times more times the weight of that test tube if it was filled with water. as a comparison lead (which we all know is heavy) has a specific gravity of 11 so gold is almost twice as heavy as lead. Gold is resistant to most naturally occurring chemicals so it doesn't tarnish and is never destroyed. Gold is also very malleable and ductile. It can hammered so thin that 250,000 sheets would make a stack just one inch high. One ounce can be drawn into a wire thirty five miles long. gold is never found pure in nature. It is usually found in a alloy along with copper, silver or platinum.
How do i know that the stuff in my pan is gold?
By its weight! - If you're panning technique is correct, the gold will be found at the bottom of the pan. As you gently swirl water around in your pan, gold acts differently than other material. It won't move as easily as the other material .
By its appearance - Because gold does not have much of a crystalline structure, it doesn't really sparkle or glitter - it shines. It also looks the same under in sunlight or the shade.
If in doubt, whack it with a hammer - extreme?. yes but, If it flattens, its gold. Now if it shatters, it isn't gold. This approach is not recommended.
You can drop it into some nitric acid. if it doesn't react it is probably gold. if it dose, it isn't. Nitric acid is pretty dangerous stuff so do not get it on you of breath the fumes. Be sure to follow proper handling procedures.
Once you see gold in your pan a few times you won't have any problems spotting it again.

Mini High Banker


This small High-Banker is relatively easy to build. I was able to bend all the pieces using some scrap steel angle-bar stock as bending guides in my bench vise. I used a rubber hammer to "refine" the edges. If you have access to a brake (sheet metal bending tool) so much the better. The thinner the aluminum stock, the lighter the completed unit will be. A definite advantage if you plan to pack it into the back country.
Some of the pieces are welded together using Flux less Aluminum Repair Rod. I found this rod very easy to use after just a few practice tries on scrap aluminum. You don't need sophisticated aluminum welding equipment, all you need is a propane torch.


1.) Start out by cutting sheet aluminum pieces 1,2,3,4,6,7,8,9,11 and 12 to plan dimensions. Note: the sheet aluminum thickness is not critical. It all depends on how rugged and heavy you wish to make your mini-banker. Slight adjustments to fit may be necessary when you bend the pieces. PC8 & 9 should be at approx 1/8" thick aluminum or steel.
2.) Lay out and drill 7/16" holes in PC2. Make sure the holes along the bend are as close as possible to the line. This reduces water loss over the end of the box. An alternate method would be to cut out this section and weld in a piece of expanded metal as a classifier.
4.) Drill 5/32" holes as indicated in PC7, 8, and 11. Drill a 5/8" in PC2
5.) Cut PC5 to plan dimensions. PC5 is floorboard matting from old Volkswagen Vans. It has a checkerboard square pattern that works very well for trapping the coarse gold. To give it some rigidity, glue the smooth side to PC4.
6.) Cut PC10 to plan dimension. PC10 is expanded metal screen.
7.) Mark pieces 1, 3, and bend 90 degrees.
8.) Bend the sides of PC2, 90 degrees, making sure the finished piece will fit inside PC1.
9.) Bend sides of PC6, 90 degrees (make sure it is slightly smaller than the inside width of PC2 so the weld will not interfere with the fit inside PC1). Bend the end tab in line with the hypotenuse of the sides.
10.) Weld the gravel guide trough (PC6) on the bottom of the Loader Box (PC2). Make sure the end of the trough is approximately 13/4" back from the end of the box. This allows room for the classified gravel to pass between the trough and the gravel stop (PC12).
11.) Weld the gravel stop (PC12) to the end of the sluice box (PC1).
12.) Fit PC3 on the end of PC1, drill four holes for #6/32 sheet metal screws. Install screws.
13.) Lay the two PC8's inside the sides of the sluice box. Trim the three PC9's to fit between the two PC8's. After you have a good fit, remove from the box and weld PC8 at each end and one in the center. This forms the riffle bar frame.
14.) Place the PC4-5 assembly in the sluice box firmly against the gravel stop, then butt the end of the miners moss at the end of PC4-5 assembly. Place the riffle assembly on top of the miners moss and drill two 1/4" pivot holes through the side of the sluice box and riffle assembly. Install 1/4" x 20 nuts and bolts. The riffle assembly should be installed so that it compresses the miners moss against the bottom of the box.
15.) Round the ends of PC11, place in the box as shown in the assembly drawing. Be sure it compresses the riffle assembly when you drill for the pivot bolts.
16.) Position PC2 inside PC1 as shown in the assembly drawing, mark and drill holes for 1/4" x 20 bolts. Install nuts and bolts so the two boxes can pivot freely. Note: the end of PC2 must overhang PC1 at least 1/2" so the larger classified gravel won't drop into the sluice box.
17.) Drill and install the braces (PC7) using 10-32 bolts. Drill extra holes about an inch apart in line with the first hole so the box can be set at different angles to suit varying field conditions.
18.) Assemble the spray bar and install using 6-32 machine screws.
The mini-banker will work well with a flow of water as low as 5 GPM since no riffles are used . The low flow is even desirable because it allows the very fine gold to drop into the miners moss. There are many gas and electric pumps on the market which are small and lightweight. The disadvantage of electric pumps is you need to drag a heavy battery around. My preference is one of those small 2 cycle gas pumps that weigh in at about 6 to 8 pounds. In addition you could add legs and/or build a 20 to 30 gallon container to use as a recirculating water setup. I'll provide plans in a future issue of several different modifications for the "tinkerers" to try.

Copyright © Jerry Bowen, Jan 10, 1994

Tips for Gold Panning

Here are some tips for gold panning.
With Gold at well over $1000 an ounce, not only is panning for gold a good way to have fun it can also be a profitable hobby. Gold panning is an easy hobby to get started as the only equipment that is absolutely needed is a gold pan and a container to hold all the gold that you find. Not just a hobby for those in Alaska or California, gold is well distributed across the United States and chances are that gold can be found in the streams near you.

A great tip for finding more gold when panning is to practice at home. Small lead shot used for loading shotgun shells or lead shaved off of fishing sinkers and other lead items can be used to practice cheaply at home. Mix the lead with sand and small gravel and practice until you can reliably pan out the lead.

As gold is even denser than lead, if you can catch the lead you will almost certainly catch the gold in your pan. When tossing out larger rocks from your pan, turn them over in your hands and give them a quick look. You don't want to be throwing away gold that is stuck to the rock. Quartz rock is especially likely to contain gold. Shake the rocks in the water as well to knock off any loose material that also may contain gold.

Another great tip for gold panning is to use a drop or two of dishwashing liquid in your pan. This is especially useful when panning extremely fine gold. The soap will help to keep the small flakes of gold from floating on the surface of the water. While gold is denser than water, the very small flakes will sometimes float due to surface tension.

A magnet is a useful piece of equipment to add to your gold panning kit. When you are trying to separate gold from black sand, the magnet can be used to attract and remove the black sand so that you can get to the gold. Special magnetic tools are available for this purpose, but regular magnets will also work. Another useful tip for panning for gold is to pan in places that are difficult to reach and that are uncomfortable to work. Most areas that are easy to access and easy to work probably have been worked over numerous times, but the less easy places might harbor a lot of gold for you to find. These are just a few tips that can be used to make gold panning more successful. T

he best tip for gold panning is to simply spend more time panning for gold.

Published by J. Motes Motes has been published in a variety of national and regional publications on subjects ranging from frugal living to rabbit hunting.